Don't fear the keymap
It’s been slow going on my custom keyboard journey. There’s a lot of friction like getting used to a new physical layout/tactile feel, experimenting and finding a good layout and learning the tooling to enable that experimentation.
It’s enough that I regularly deprioritize learning and fallback to my Apple keyboard. I finally am landing on this workflow that is likely obvious to everyone else in the custom keeb space, but thought I’d share for my future self and anyone else looking to simplify their keyboard customization process.
- Edit
keymap.cdirectly - Compile the firmware
- Flash the firmware
Tooling
I won’t go in to installing these tools and assume they’re already setup, but here is what I am working with:
- A text editor (Zed in my case)
- QMK Toolbox
- QMK CLI
If you do want to learn more about these tools and getting setup here are some resources I’ve found helpful:
- How To Program Your Keyboard With Code Instead Of QMK Configurator
- QMK Tutorial: QMK Toolbox (Flashing Firmware On Your Keyboard)
- QMK Tutorial: Keymap Creation Tips
- How to flash a Split Keyboard
Editing the Keymap File
OK so after trying the various GUI tools like Oryx (when I was trying out the MOONLANDER), QMK Configurator and VIA I’ve settled on editing the keymap.c file directly.
I appreciate the visual feedback of the GUI tools and will still sometimes upload the JSON version of my keymap to QMK Configurator to explore and print out to do some analog experimenting and assessment. What I find cumbersome is generating the necessary JSON to upload to Configurator, fumble around the UI, exporting the artifact needed to then produce a new keymap file. Not a quick enough feedback loop for me that that I just stopped doing it all together.
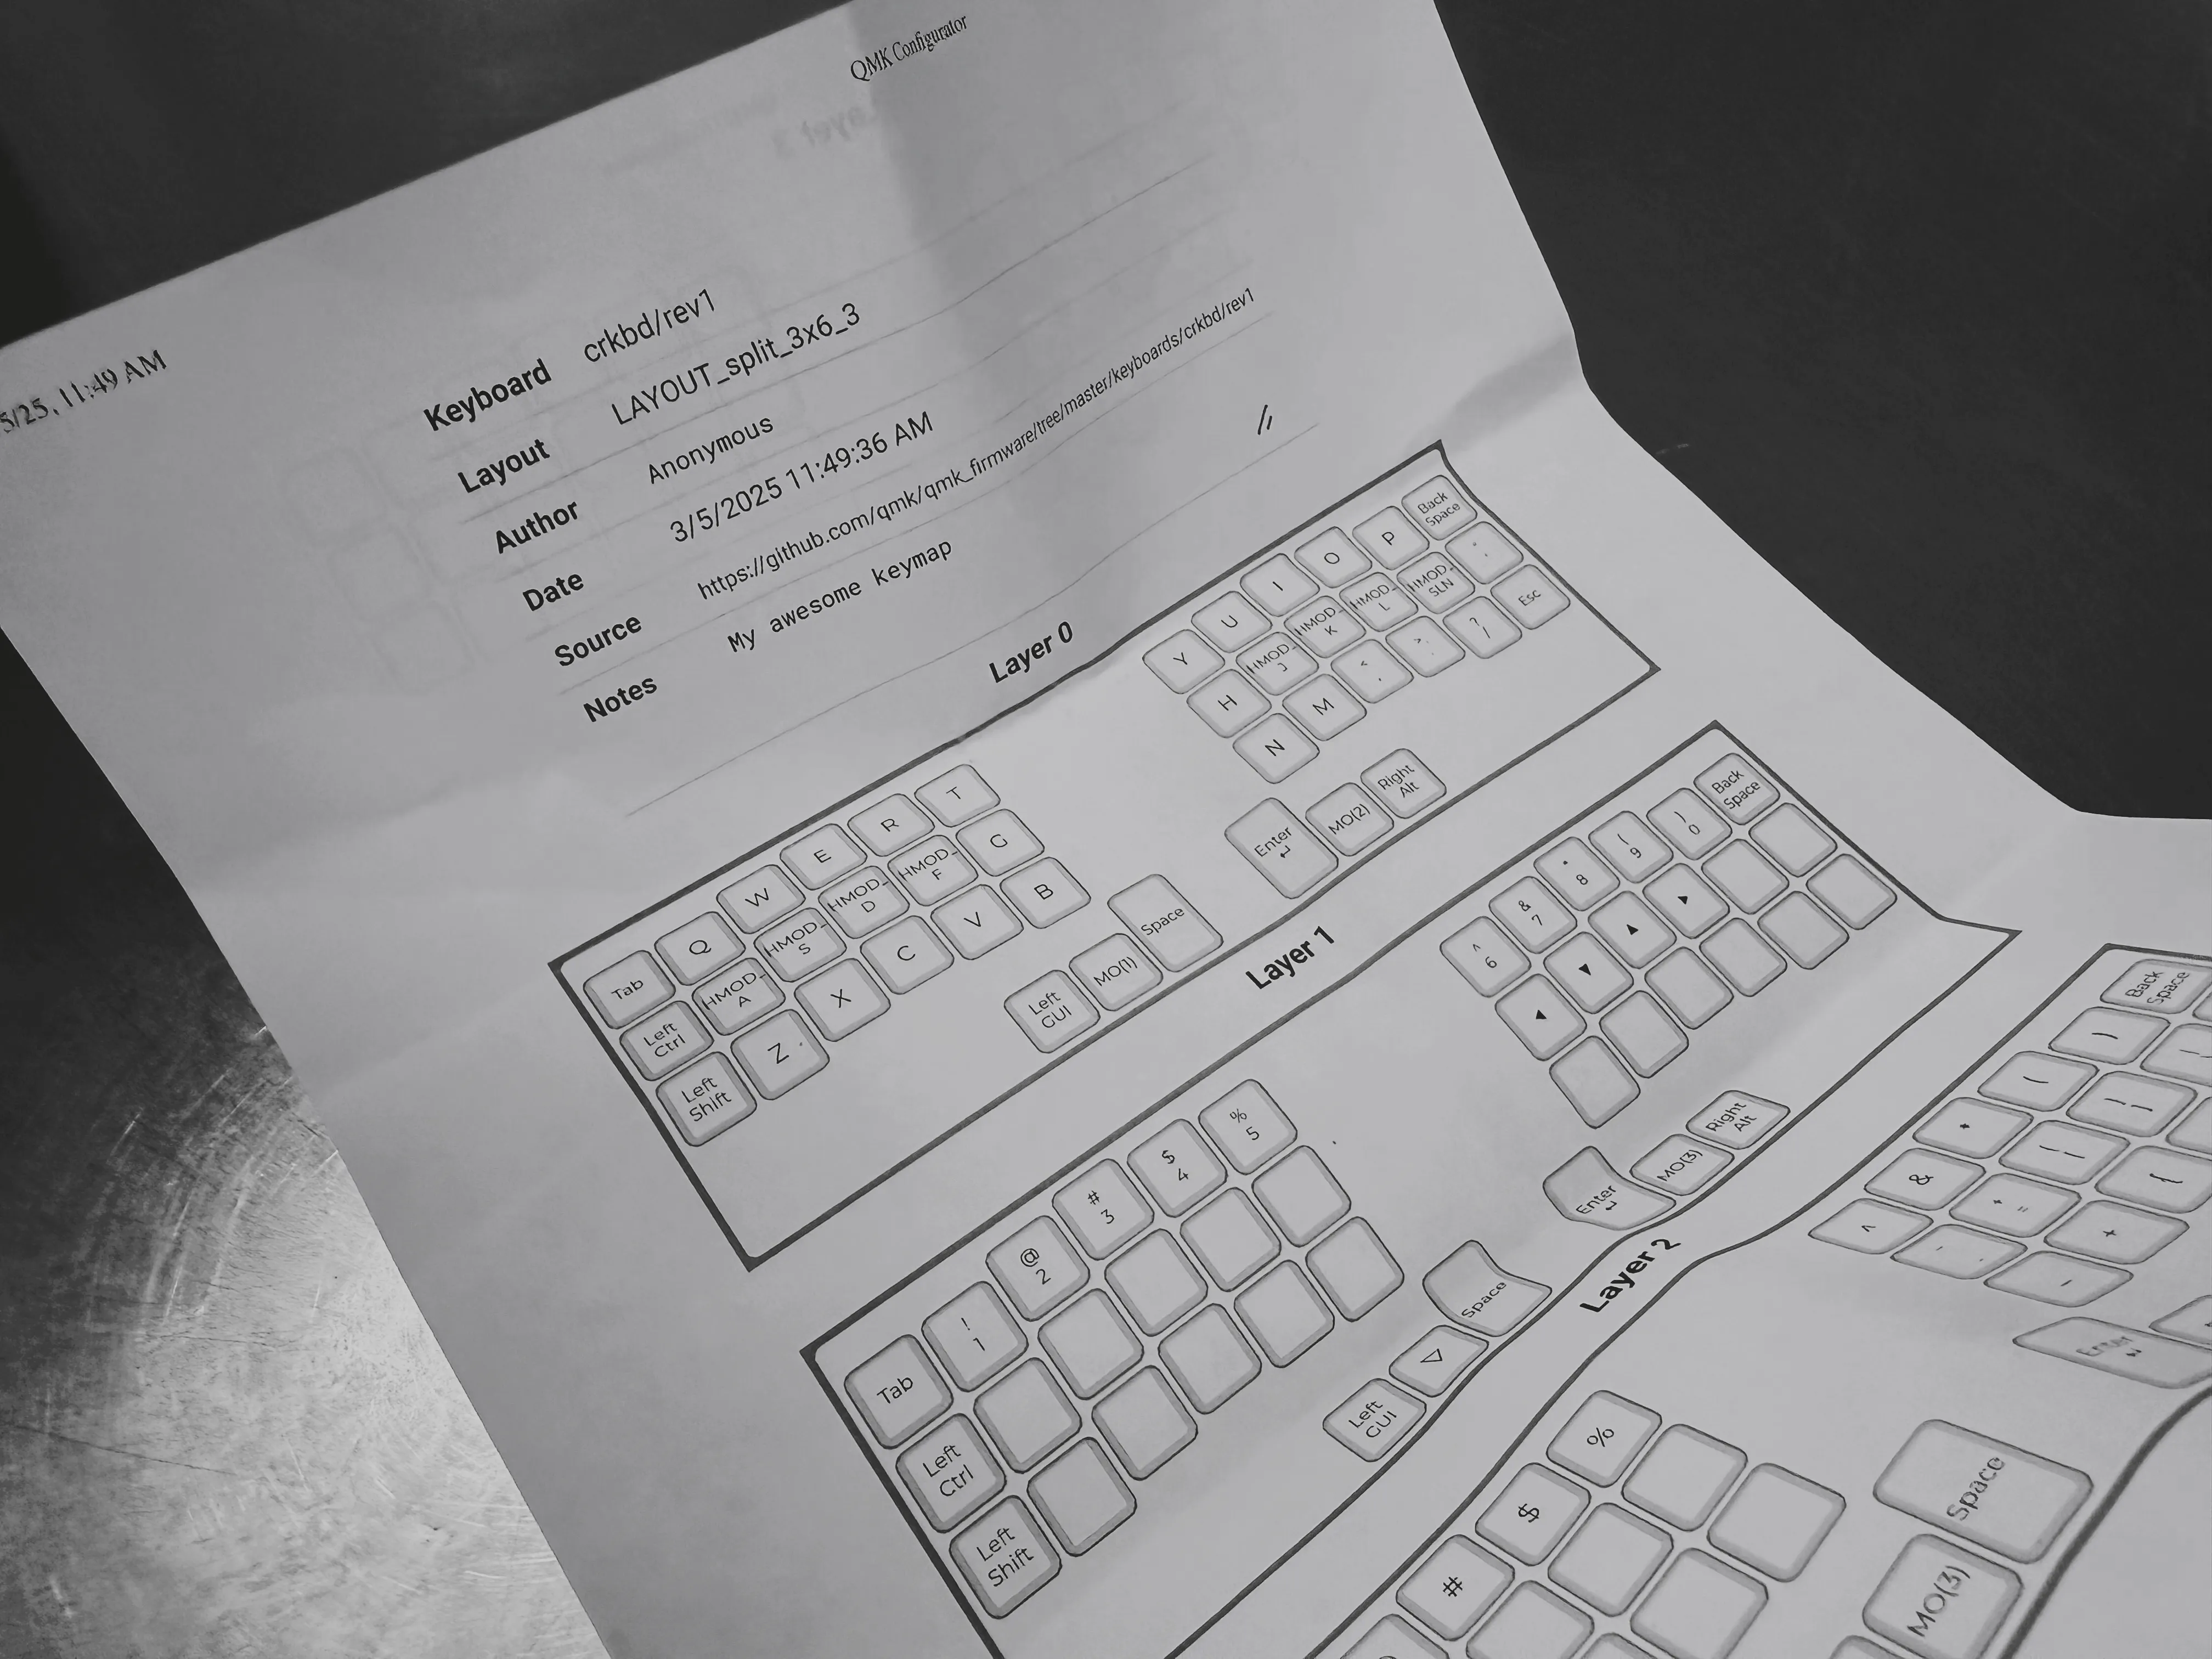
I always saw the file as precious. If you haven’t seen what a default keymap file looks like here is a screenshot of mine:
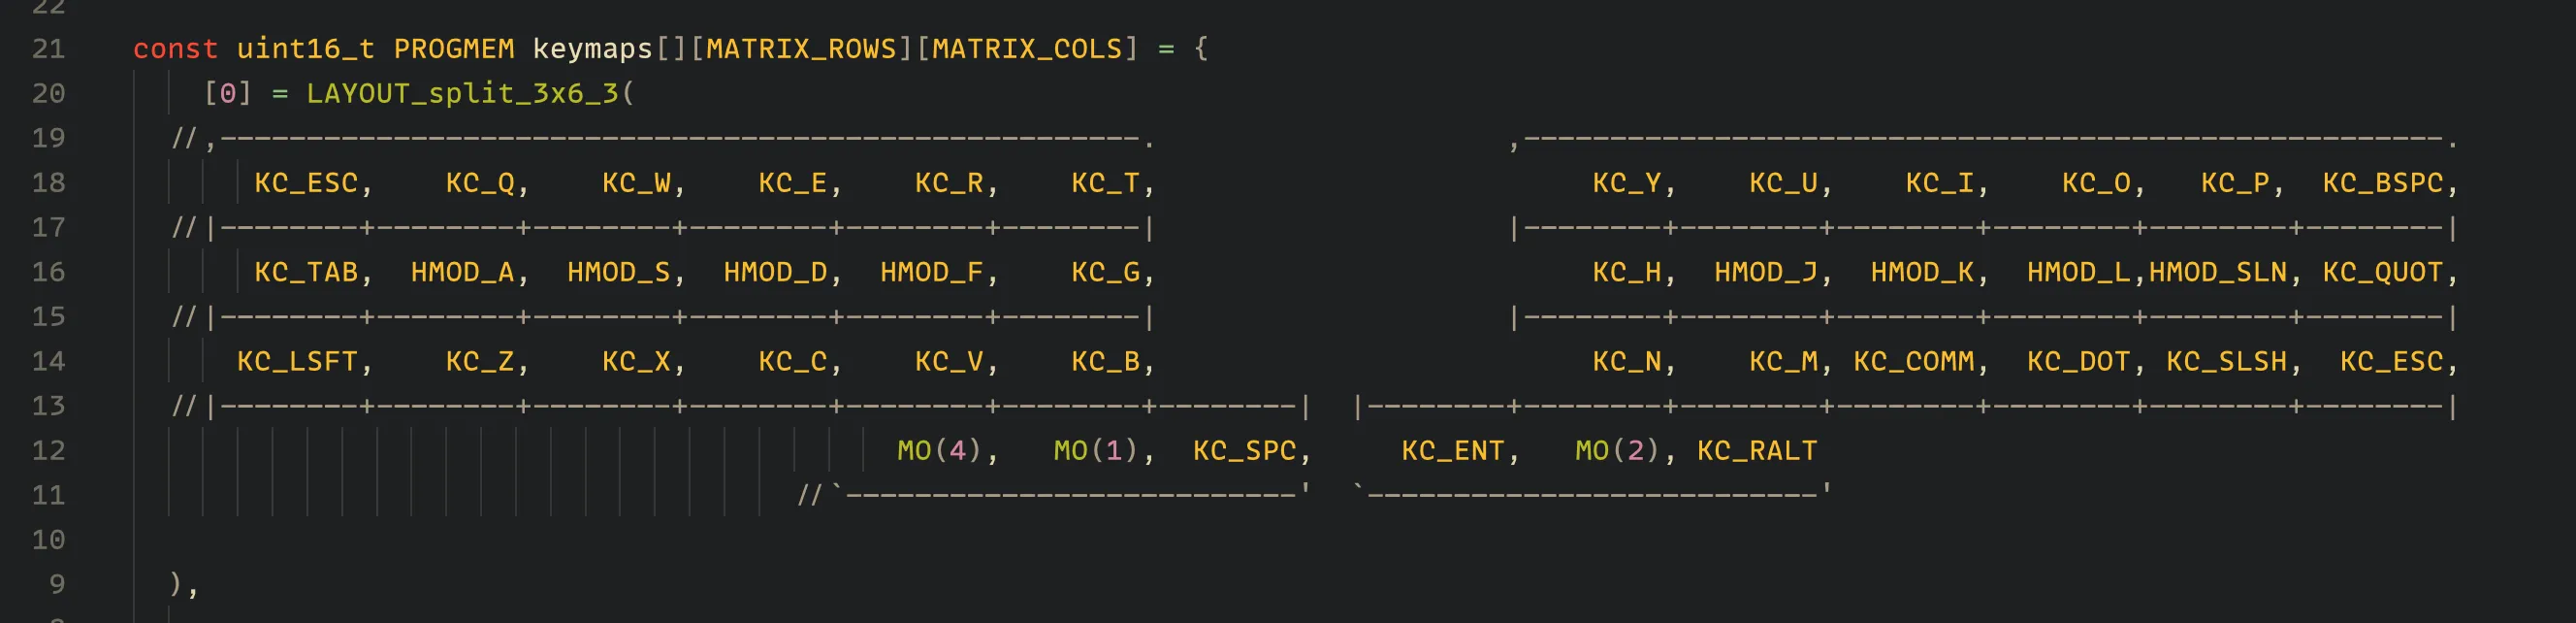
It’s very well formatted and I didn’t want to ruin it with my grotesque edits. It also felt like most people used the GUI tools as well so I didn’t give it much consideration. On top of that I haven’t worked much in lower level environments and have had little experience with C. I can get things done with it, but just another point of friction making it easy to neglect the practice.
What has changed?
I’ve been moving to text oriented tooling lately, primarily in shell environments. There seems to be a renaissance in TUIs and simplifying software. I think it makes sense with most GUI/SaaS based offerings suffering from enshittification. Some of my current favorites:
- lazygit – Git management
- lazydocker – Docker management
- yazi – File management
Basically I am enjoying working more directly with text and simplifying my workflows. That plus having an AI assistant in my editor I’ve been finding it fun to work directly in the keymap.c file.
If there is some bit of C I don’t know offhand I can start a chat. I don’t need to look up many of the key code mappings since AI likely knows. I can think about what physical key I want to customize and prompt AI to help with even more complex maps like macros and modifiers. Here is a recent prompt:
I want to update layer one to have keys that navigate forward and backward through tabs (
⌃Taband⌃⇧Tab). The keys I want to replace are currentlyKC_4andKC_5.
Its first suggestion was exactly what was required, but it did mess up the previous formatting 🙀. So I followed up with:
Can I alias those so they fit in the key shape? 8 Character max.
And it gave me this:
#define TAB_NXT C(KC_TAB)     // Next tab (Ctrl+Tab)
#define TAB_PRV C(S(KC_TAB))  // Previous tab (Ctrl+Shift+Tab)
Didn’t need to leave my editor or anything. I still have a visual sense of how keys are configured and I didn’t mess up the original formatting.
Thanks to this tighter feedback loop it’s more fun and easier to experiment and configure my keyboard.
One last thing
There are certain details I am picking up on having worked more in the file that have helped me make peace with editing it, but one I wanted to mention is the key codes in each key are all right aligned and the comma lines up with the vertical edge of the key shape. This and that the key shape can fit 8 characters has helped me keep the formatting intact.
Compiling
This part is simple enough for me:
qmk compile -kb crkbd -km derekrI often just navigate through my shell history (is use fish) so it’s a matter of typing qm and pressing the up-arrow key to compile.
The thing that I was over-thinking previously was this compiles to the same location every time. This is good to remember in the next step when flashing the compiled firmware. By default it gets compiled to:
~/qmk_firmware/.build/crkbd_rev1_derekr.hexFlashing the firmware
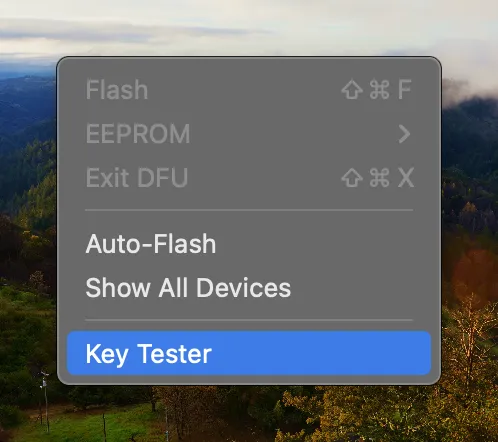
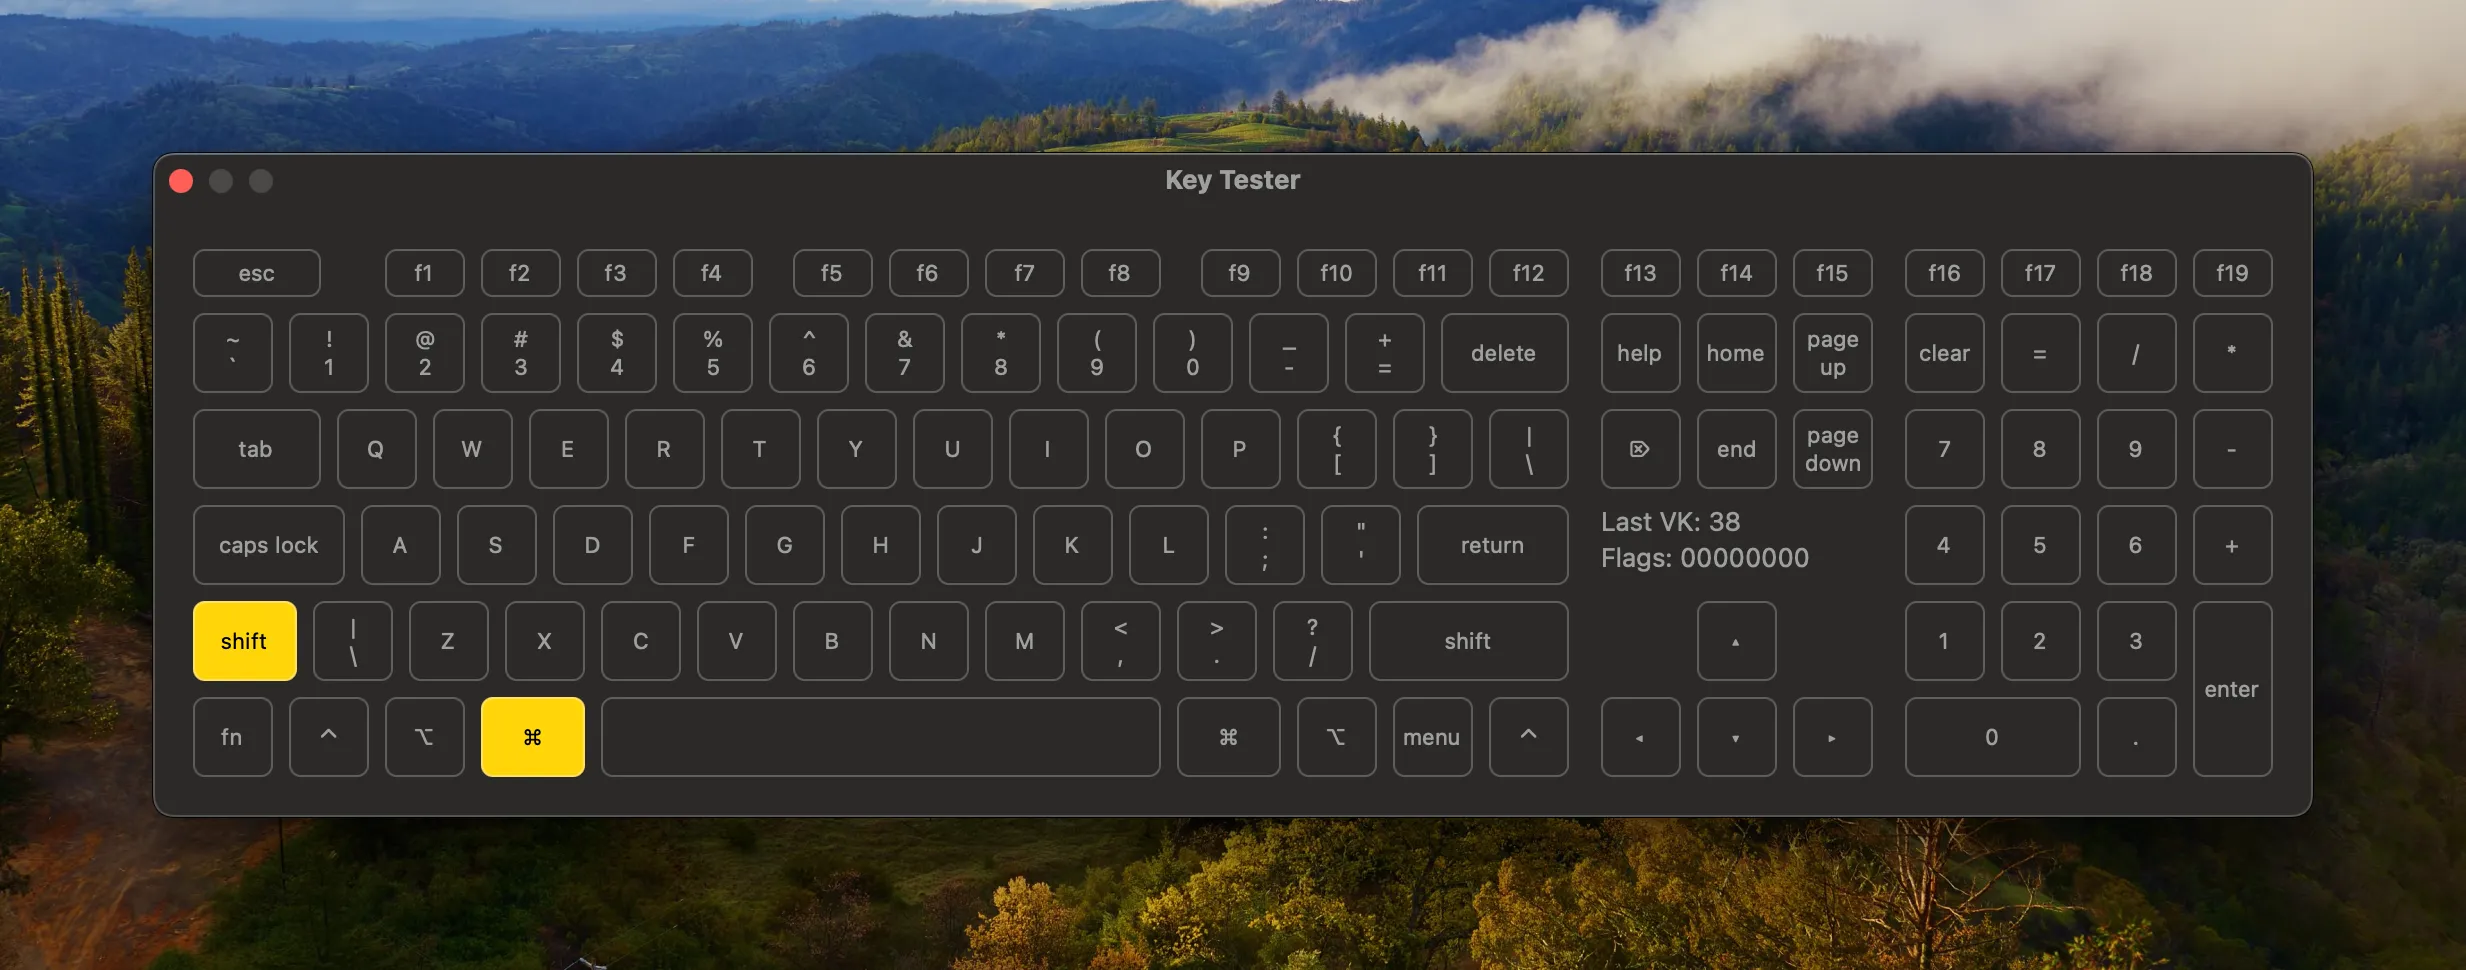
[!NOTE] This part of the flow can be done w/ qmk_cli and I will probably adapt my flow to use it, but I am still using QMK Toolbox out of habit and to use the Key Tester feature.
This too is simple enough for me, but another part of the flow I would over-think due to my unfamiliarity. Also “flashing firmware” is always a step where I’m like… “OK I can fuck something up here”. Just like everything though given enough time I got past that and have observed one thing that helps make it click just how quick it is to do this:
It remembers the last firmware you selected across app launch.
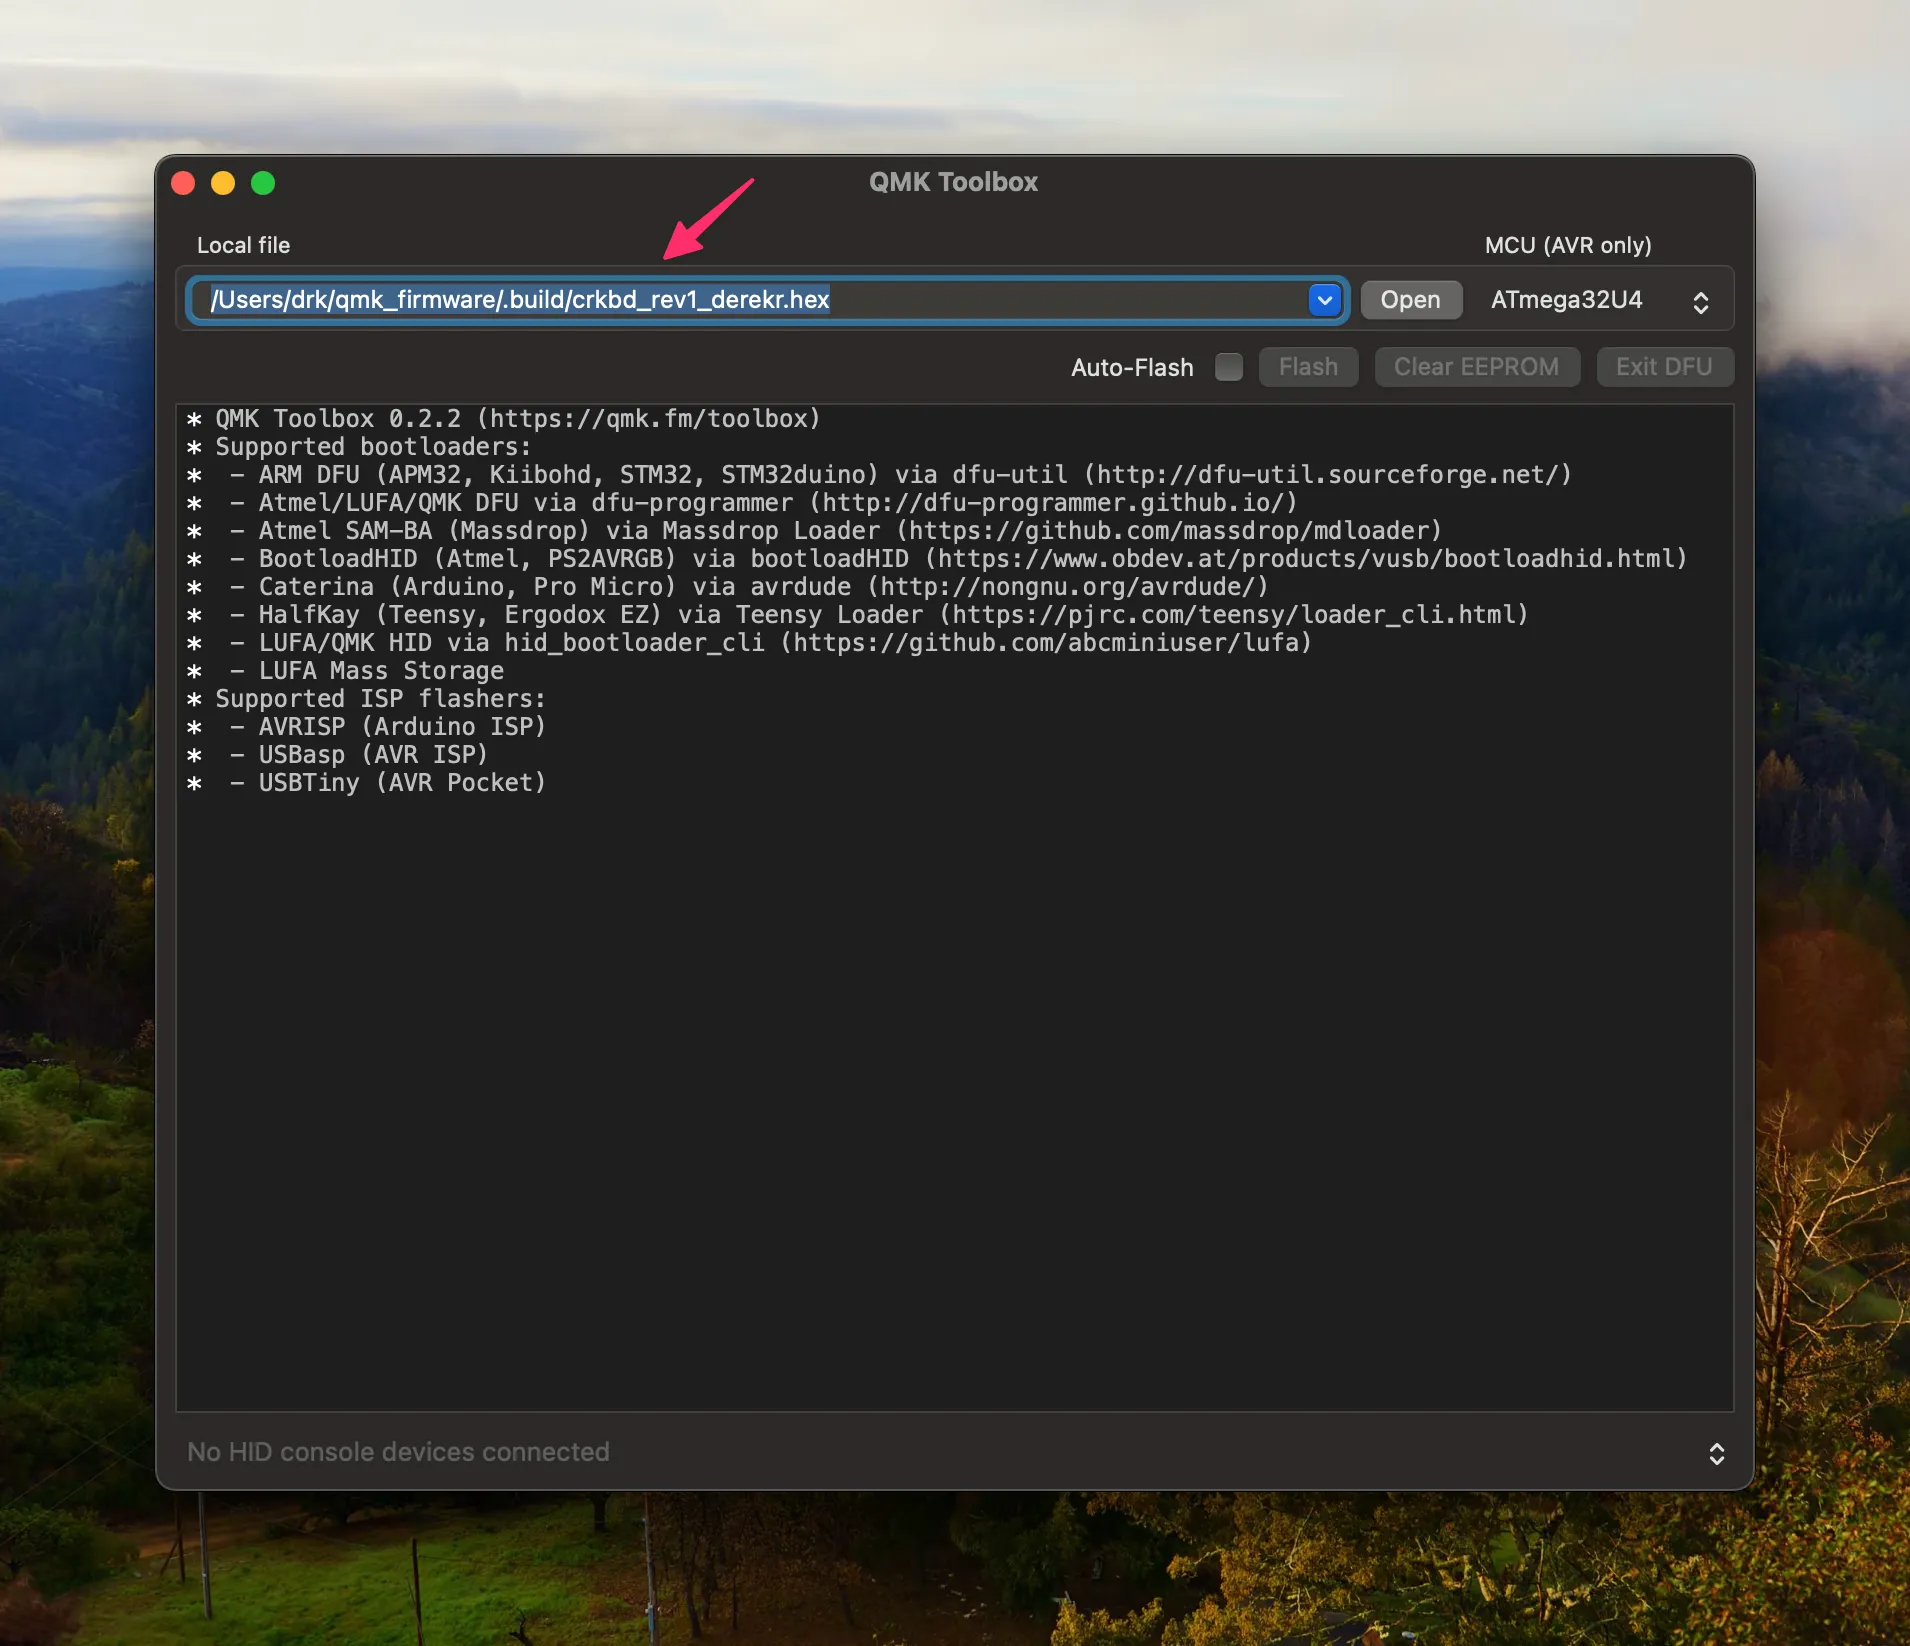
That’s it. That’s the thing.
Now that it’s cemented in my mind the overall flow of editing, compiling and flashing feels seamless. Editing a key and getting it on my keyboard now usually takes maybe 1-2 minutes. Now when using my keyboard if something feels off or I get an idea for something that would be cool I can get it on my keyboard in under 2 minutes and carry on with my day. Before I would think “welp that sucks” or “oh that’d be nice” and then go back to my Apple keyboard. Not anymore!
Bonus
QMK Toolbox has a helpful feature for visually testing your keys. I always thought that was only in QMK Configurator before digging through Toolbox to see what it had to offer.